Today we really got down to polishing and deanodizing. We worked out a system where my father would deanodize in front of me and I would follow him around with the polisher. It took about 10 hours to get from the the left front corner to the right center section resulting in a pretty decent rough polish. The entire lower section of the camper is deanodized now.
Several people have asked me for some dierections or steps for doing this process. I am by no means the first person to do this and I have learned a lot from those who have but here’s what we have come up with that works very well.
1. Clean the area to be worked on with soap and water. Remove any sealer that is on the surface of the aluminum. Use paint remover to get rid of any stickyness from stickers, sealers, paint tape etc..
2. Tape off areas that have already been polished, deanodized previously or that you do not want to get oven cleaner on.
3. Spray a thick coat of oven cleaner thoroughly on the surface to be deanodized. Wait 5 -10 minutes but not longer as it is a pain to get off once the anodizing/oven cleaner mud starts to dry. The Oven Cleaner will start to bubble and turn brown where it is actively removing the anodizing. After a while it will start to slide off on its own. It creates a pretty thick mud of Oven Cleaner and andoizing. Wash thoroughly with water and dry and clean completely with paper towels.
4. Spray a thick coat of oven cleaner again. Let it work for 5 minutes and then scrub well with green brillow pad. This time there wont be as much mud or brown stuff. With practice you will be able to see where there is anodizing left that you need to scrub. Once all the anodizing is gone, spray with water and clean just as in step 3.
5. Now you have bare aluminum. However, there is some oxidation that might have eaten through the anodizing over the long life of the camper that Oven Cleaner will not remove. We used Tunebrite, a product for cleaning pontoon boats, which we had on hand, and it works really well! It cleans up the aluminum and gets rid of any oxidizing that might be hiding on the surface or in pits or scratches. Scrub it in with a clean brillow pad and wash it with water and paper towels again. Now you have a very clean and corrosion free surface to polish. In fact, it looks pretty good at this point. If you didn’t want to polish it you could stop here and have a nice brushed aluminum look.
6. The first polishing process is to get a rough polish across the entire camper. You want to do this so that you can seal all the panels, install lights, fixtures or whatever and later come back for a final polish with a lighter compound. So, take a big finger full of Nuvite F7 and smear it on the panel to be polished. I use a Dewalt variable speed polisher set to 1400rpm with a wool buffing bonnet available at Lowes or Vintage Trailer Supply. I take the buffing pad (not turning) and smear the Nuvite all over the panel that I am going to polish and then turn on the polisher and start working. It will immediately turn everything very black and you just keep polishing from side to side or up and down in slow strokes until all the black is gone. After the first few minutes you will have a shine. At this point, once all the black is gone you may have found areas that you need to go back and deanodize again. You can do this with no problem but you will have to repolish the whole panel as the Oven Cleaner turns everything white again. It is best to make sure you have all the anodizing off before you start polishing but every once in a while it will happen regardless. If everything is good put on some more polish and do it all over again. I found that I needed to hit each panel 3 to 5 times to get a decent polish that got out most of the pitting and scratches.
7. The above polishing will get most of the panel looking nice. However, there are going to be places that the big buffing pad just wont get into like window frames or some rivet lines. I use a buffing wheel from Lowes on a drill. Put some Nuvite F7 on the places that need work and go to town. Repeat as many times as necessary. This buffer leaves big swirl marks so I try not to use it on the flat panels. Later you will come back and final polish these areas to remove the swirls.
8. After all the polishing for the panel is finished take a clean and dry terry cloth rag and clean up the black stuff left by the polish in places where it does not come off like around rivets and pane lines. If you haven’t deanodized the next section tape off the one you just did with masking tape and plastic. If you have deanodized the next panel then just put on some more polish and keep going. It’s a good workout!
Some other notes:
-Buy two big 15 roll bags of papertowels. You need a lot of them.
-Buy a big box of rubber gloves for working on the deanodizing process. They only last for a few panels at a time before you will tear them or they get brittle.
-If you are worried about the surface under the camper put down a big plastic drop cloth to collect all the chemical mud that will come off the camper.
-Buy a case of Easy Off oven cleaner. Seems to work best. The stuff we got at the dollar store was not as good.
-Buy a case of brillow pads from Lowes. They get worn out after one or two panels.
-I will have used an entire pound of Nuvite in this first polishing process on just the bottom half of the camper. You will probably need two pounds of F7 and one of the lighter grade.
-We have used 4 buffing pads so far. You will need about 10 to do the whole thing. I haven’t cleaned them yet so I don’t know how well they work after that.
-Working as a team, this first polishing is going to take about 50 hours including the deanodizing. By yourself it would take more than twice as long. It is rewarding and fun work though.
-
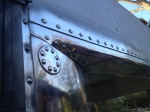
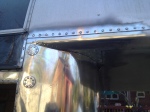
- Reworking the antenna delete.


-
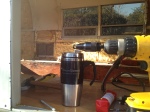
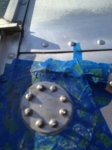
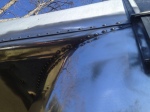
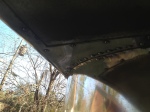
- The rivet shaver


-

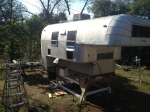
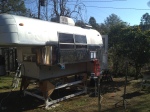
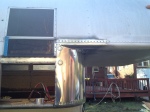
- Right side 3 polishes. Left side 1.
-
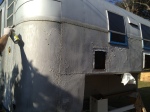
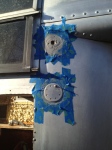
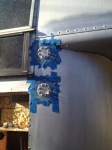
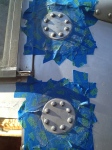
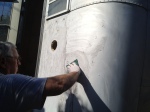
- Deanodizing in progress. First spray of OC
-
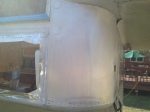
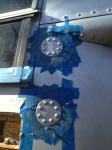
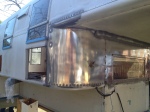
- Deanodized and Tunebrited.
-

- First polishing in progress
-
- First pass of the polisher complete.
-

- Second pass of the polisher.
-
- 3rd Pass of the polisher.